Homebrewing Equipment

Are you a devoted beer enthusiast, longing to create your own distinctive brews? Does the idea of homebrewing something you’ve been itching to try?
Enhance your beer-making skills and make informed decisions regarding your homebrewing equipment right from the start.
Whether you’re a seasoned brewmaster or just starting your brewing journey, having the right tools at your disposal is essential for crafting exceptional beers that reflect your passion and creativity.
In this guide, we’ll explore the world of homebrewing and help you make the best choices for your brewing setup, ensuring a satisfying and enjoyable experience.
Home-Brewing Equipment Essentials
Take a Look at the Brew Pots & Kettles
This is a pretty basic and very essential thing to hold your wort. A stainless-steel pot for brewing can be your best choice as it’s durable, easy to clean, and doesn’t get discolored. If you plan a low-budget brewing, aluminum brew kettles can substitute well.
![GasOne 10 Gallon Stainless Steel Home Brew Kettle Pot 4pc Set [40 Quart]](https://m.media-amazon.com/images/I/41j4+8jrZML._SL500_.jpg)
HIGH QUALITY STAINLESS STEEL- Very easy to clean, long lasting, safe and durable. Welded Ergonomic Handles - ensures a sturdy and safe brewing experience when dealing with high heat.
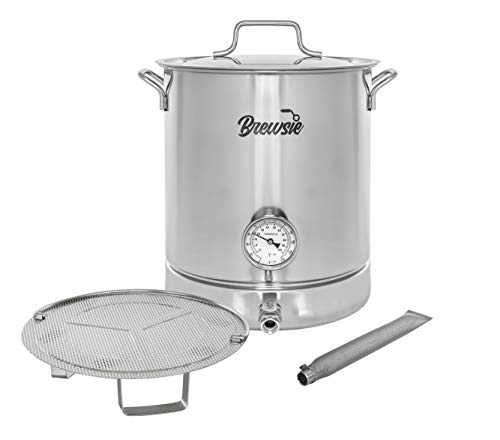
Brew Kettle Set Includes: Brew Kettle, Lid, False Bottom, Bazooka Screen, Thermometer, Ball Valve, Inner Connector, and all hardware. Dual Filtration maximizes efficiency.Size: 12.5" Wide x 17.5" Height. Weight: 14 LBS
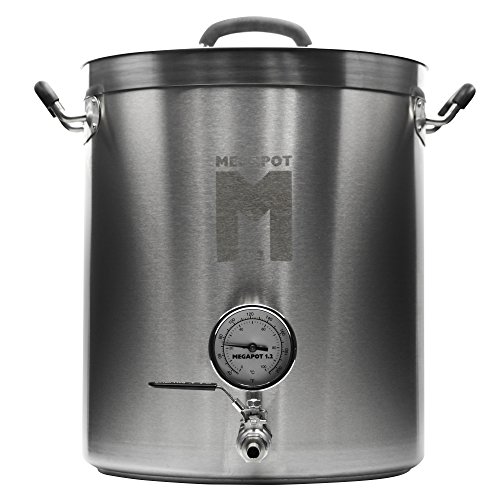
15 gallons (60 quarts / 56.7 liters) capacity (available in 15, 20, and 30 gallons. Graduated Volume Markings Inside the Kettle. Silicone Covered Handles for Safety. 4mm Tri-Clad Bottom. All Stainless Steel Construction. 15.7 Inches in Diameter and 18.3 Inches in Height
Wort Chillers to Keep Beer Cool
If you want to cool your brew quickly to avoid the growth of bacteria, never try running the wort through a water tub. It might crack and harm you.
So, get any of these three— immersion chiller, counterflow chiller, or plate chiller to cool your brew.

The Coldbreak 12.5' wort chiller is made out of heavy-duty copper and features reinforced tubing, which makes it ideal for cooling 2 to 3-gallon batches of wort.
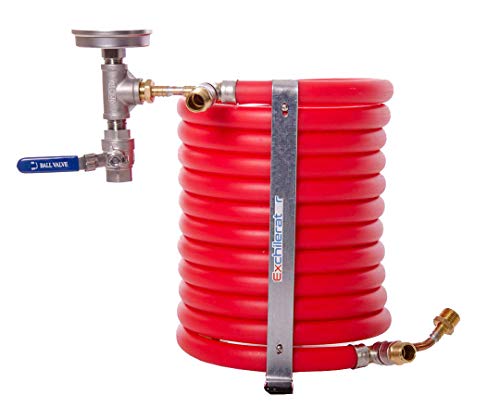

This 3/8" x 25' long stainless steel wort chiller includes a 7 feet long vinyl outlet hose. Reduce your wort temperatures quickly with this economy ss chiller.
Beer Funnels and Brushes
The beer funnels are not expensive and very useful. You also need the brushes to clean the bottles and all.
Measuring and Testing Tools
You need to have accurate measuring and testing tools for a better brew. For instance, to determine the specific gravity and the transformation of wort to beer, you may want to get hold of a hydrometer and test jar. For more advance brewers, there are some great wireless technology options available too. Either way you choose to go, these are essential home-brewing equipment that you will need.
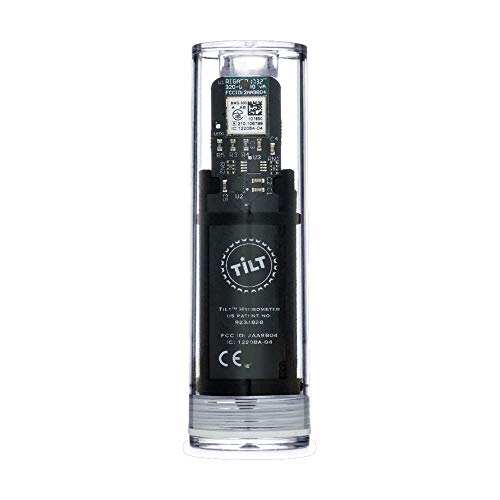
Tilt's wireless hydrometer is compatible with your phone/tablet and works with both iOS & Android platforms.

Plaato is the world's first non-invasive fermentation analyzer. Wifi-connected. Measures: specific gravity + fermentation activity + alcohol content + temperature.

First all-in-one system that keeps a track of how much is left in your kegs, the volume of each poor and detects leaks. WIFI-CONNECTED. Get access to your beer stats straight on your phone from wherever you are.
Digital Scales
To measure the ingredients perfectly and brew a good beer, you need to use the digital scales.
Boiling Equipment (Propane & Electric)
Boiling is essential in every brewing process. To kill the bacteria, add in the hops, and flavoring grains. So, pick the right tools for boiling. Propane burners or electric heating is the big decision in this category of essential beer brewing equipment.
Propane Units:

72,000 BTUs of finely-tuned firepower that goes from zero to full boil in no time flat. This is the new gold standard of homebrewing propane burners.

65,000 BTUs from a 6" Diameter Burner Boils 5 gallons or wort in ~20 minutes.
When you want to get brewing and looking for a budget friendly option, this one is it.

14-inch diameter cooking surface, solid 1-piece welded steel frame, and wide-set legs for stability. Quick and easy setup, this unit is made for small batches and easy of use.
Electric Stovetops:

Works with ALL types of Kettles. Infrared burners take only a few seconds to heat up. Powered by 120V and 1200-Watts. Single Dial Temp Control
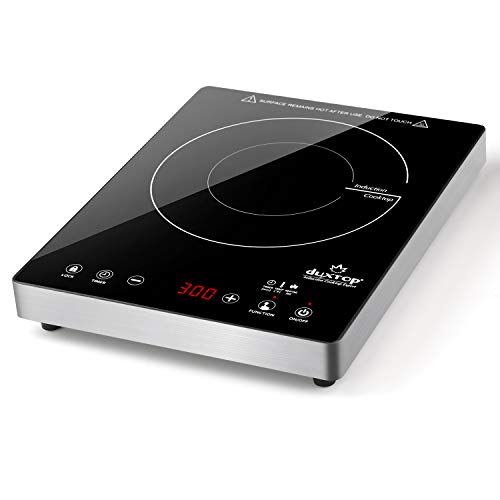
HIGH EFFICIENCY: Choose from 20 preset power levels (100W to 1800W) and 20 preset temperature level settings (100°F to 460°F).
SENSOR TOUCH PANEL: Built-in LED screen touch panel
EASY-TO-CLEAN FULL GLASS PANEL: This commercial-grade quality induction hot plate features a seamless glass cooktop, making clean up easy.
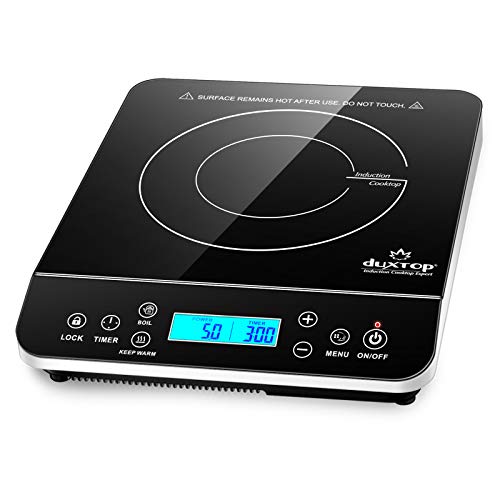
110/120V 15 amp electrical outlet–standard. ETL listed and built to North American electrical standards. It is lightweight and compact for easy handling and storage. 1800 Watts Wort Boiling Power.
Beer Bottling Accessories
As you can’t drink the beer directly from the carboy, you’ll need beer bottling accessories like bottles, growlers, caps, beer bottle crown caps, cappers, fillers, washers, brushes, and spigots to bottle the brew.
Drying and Storage Racks
To avoid any excess water left when you wash the bottles, you need to let them dry before you bottle the beer.
Labels
You can buy labels or make your own at home. Though it’s not vital to label them, it’s so much fun and avoids the confusion too.
Beer Sanitizers
From the yeast you use to the beer you brew, you need to maintain sanitization throughout the process. Everything you use in the brewing and bottling process has to be clean to prevent the growth of bacteria.
How about cleaning the beer line?
You can use the line cleaners in any form like powder, and tablets. Some line cleaners can be harsh, so be careful before using them for beers and rinse them well.
Are your hands safe?
A beer sanitizer is a must-have while brewing a beer. You can get the beer sanitizers in powder or liquid form. Dilute the sanitizer in water and mix for the proper dilution. Now, flush all your home-brewing equipment through the sanitized water.
Get the Equipment Kits You Need
Instead of buying individual pieces, you better buy an equipment kit. It’s suggested to make a list of the tools you need and then go buy a kit. So, if anything you don’t get something you need, you may have to buy it. You don’t want to go through that moment when you realize that you forgot to buy an item after you start brewing.
Extract Brew Kits
Their price is affordable and best for the homebrewers whether you are a newbie or not. These extract kits need very less equipment. You need to add water, ingredients, and the extract to the kettle. Now, start boiling and cool the wort.
Then, ferment the wort for a few weeks before bottling. You can skip the mashing process with these kits.
The All-Grain Brew Kits
If you want to level up your brewing, all-grain brew kits are the best. They don’t need extract but they do have some good flavors that you can use. If you’re a beginner, you need more equipment for this than the extract kits. This calls for the “splurging you.”
Partial Mash Brew Kits
If you don’t want to spend so many bucks and don’t want the basic extract, this partial mash kit is a good choice that uses grains and malt extract. You just need a boiling kettle, a grain bag, a drink cooler with a plug, and a bucket. So, this one’s affordable if you want a medium that’s between extract and all-grain kits.
Don’t forget the Brewing Ingredient Kits
Beer brewing kits are classified based on the base. You can have them as a liquid extract, or in the form on milled grains. Some of the kits have both of them. These kits are economical to set the process up, but it all depends on where you purchase it and how you want to brew. If you need any extra items like brew bottles, check before buying the kit.
Additional Beer Brewing Equipment to Consider:
Here are some tips to help.
- Ensure you buy a propane burner of appropriate British thermal units (BTU). If you’re going to pick a camping burner that’s not designed to be used as home-brewing equipment, ensure its short and has wide legs, so it won’t tip over when a large pot is placed on it.
- The filter screens and infusers help you get the flavor into the brew without any mess. A hand strainer also works, but a mesh hop bag is a convenient method. You can use it to throw in the hops into a bag, and then place it in the kettle.
- The paddles and spoons made up of stainless steel, plastic that can resist heat, wood, and bamboo can be used to stir the brew. You can use any of your tools that are long and strong for stirring.
- You might be using a candy thermometer or an odd meat thermometer, but the stainless-steel thermometers are more accurate to read the temperature.
- You need to have the right equipment for fermentation to get good alcohol content and carbonation for your beer.
- You’ll need a good container like Glass Carboy, Plastic Carboy, Fermenter Bucket, Conical Fermenter, or an Oak Barrel that can hold the wort. This is an important process when it’s turning into beer.
- You can use thermostat or wraps and pads for better temperature control of your beer.
- You’ll need Siphon Hose, Silicone, or a Vinyl Beverage tubing to move the beer out of the container, to move the hot wort, and for other uses. You need to get the right-sized tubing. Keep it sanitized and replace it regularly.
- You’ll use this rubber stopper bungs to airlock the fermenters, and growlers So, buy a bung of the right size and it’d be much better if it’s a pre-drilled hole.
- Instead of using your mouth, use these racking canes by attaching the short end to the tubing and inserting the order end into the beer to transfer it. This reduces the growth of bacteria.
- To use a siphon, fill the tube with clean water, close the end of the hose, and insert the tube into the beer.
- A keezer or one of the best kegerators for keeping your beer cold and ready to serve.
Our Full List of All Homebrewing Gear Reviews:
- 10 Best Cooler Brands [Premium & Budget Picks]
- 10 Best Giant Coolers [Buyer’s Guide]
- 10 Best Rotomolded Coolers [Affordable & Premium Brands]
- 10 Pieces of Home Brewing Software Compared
- 11 Best Coolers for Ice Retention
- 32 Inspiring DIY Keezer Designs with Tutorials
- 5 Best Yeti Cooler Accessories [Comprehensive Review]
- 6 Best Golf Cart Cooler Bags, Sleeves, & Tubes
- 9 Best 12V Electric Coolers [Top Picks, Buying Guide, and FAQs]
- All-In-One Brewing Systems
- Are YETI Coolers Worth It? Is It Worth the Hype?
- Beer Bottle Trees and Drying Racks
- Beer Coozie: Essential Guide to Chilled Drinks
- Beer Deer Review: Doe My Deer, A Beer’s Near!
- Beer Flights: Easy-Serving Beer Accessory
- Beer Steins: Authentic German Craftsmanship to Modern Classics
- Belgian Beer Glasses: Authentic Designs From Brussels to Your Bar
- Best Backpack Coolers: Dive into Portability, Durability, and Frosty Features
- Best Beer Coolers [Recommended in 2024]
- Best Beer Mugs: Ultimate Blend of Craftsmanship & Functionality!
- Best Cooler with Speakers: Top Picks for Epic Outdoor Entertainment [Must-See]
- Best Cornelius “Corny” Kegs for Efficient Homebrew Storage
- Best Electric All-in-One Automated Brewing Systems
- Best Electric Cooktops for Induction Home Brewing
- Best Glycol Chillers for Home Brewing Compared
- Best Homebrewing Books: From Basics to Mastery, 10 Essential Reads!
- Best Kegerators for Home Brewers
- Best Propane Burners for Home Brewing: Fueling the Fermentation
- Best Rolling Coolers (With Wheels): Glide into Refreshment on the Move
- Best Smart Keg Monitors
- Best Stout Beer Glasses for Your Home Bar
- Best Tequila Glasses: Every Agave Drop Savored with Must-Have Designs
- Best Wine Bottle Chillers to Try Out
- Blichmann BrewEasy Vs. DIY Homebrew Setup
- Blichmann HopRocket vs. DIY Randall
- Bottoms Up: Your Guide to Beer Bottle Types, Uses, and Care
- Brew in a Bag (BIAB) Review and Process
- Brew Kettles for Homebrewing
- Brewing Shoes: Blend of Safety, Comfort, and Style for Slip-Free, Safe Brewing Experience
- Brutus 10 Build: Step by Step Guide
- Building The Ultimate Home Brewery: Crafting Your Beer Paradise
- Chugger Pumps, Beer Pumps, and Food Grade Wort Transferring Setups
- CO2 Tanks, Cylinders, and Canisters: What’s the difference?
- Collapsible Cooler: 5 Best Models for Ultra-Portability
- Cooler Accessories: From Essential to Extraordinary [Expert Recommendations]
- Cooler Hacks: Transform Your Ordinary Cooler into a Cooling Beast [Step-by-Step]
- Coolers Like Yeti But Cheaper: The 10 Best Yeti Alternatives
- Craft Master Vs Growlerwerks: Pressurized Growler Comparison
- Digital Wireless Hydrometer and Thermometer
- DIY Beer Tap Handles: 3 Simple & Cheap Builds
- DIY Jockey Box: Crafting Your Beer Keg Cooler Made Easy
- DIY Kegerator: From Ordinary Fridge to Extraordinary Beer Station
- Fermentation Chamber Options: From Basic to Advanced
- From Moonshine to Whisky: Best Still Kits for Mastering Home Distillation
- Getting Your Feet Wet with BrewPi
- Grain Mills – A Must Have for Homebrewing
- Growler Carrier Sleeves: Stylish Drop Protection
- Growlerwerks uKeg Review: Does It Live Up to the Hype? [Full Test]
- Homebrew Gadgets: Essential Brewer’s Arsenal for a Hassle-Free Brew Day
- How Long Does Dry Ice Last? In-Depth Look at Shelf Life, Storage, and Expiration
- How to Clean a Cooler: Wash, Sanitize, & Air Dry
- How to Make a Still That Shines: DIY Journey to Distilling Delights
- How to Paint a Cooler: 6 Easy Steps
- Hydrometer vs Refractometer: Which is better for Home Brewers?
- Inkbird ITC-308 Temperature Controller Review – Must-Have Device for Hombrewers
- IPA Beer Glasses: Top 6 Picks + Everything You Need to Know
- Jockey Box: Easy Homebrew Distribution
- Keg Accessories
- Kegerator Cleaning Guide: Keg, Beer Lines, and Faucets
- Kegerator Setup Guide: Do it Right the First Time
- Life-Changing Beer Gadgets that Changed the Game
- Locks for Coolers: What Are the Best Cooler Locks to Get?
- Mini-Beer Kegs: Seamless Sips and Portable Pints
- Motorized Cooler Scooters: Lazy Way to Keep Your Drinks Chilled & Zoom Around!
- Nitro Cold Brew Coffee Maker: The uKeg Review
- Nitrogen Tanks – Homebrewing Needs
- Nucleated Beer Glasses: The Magic Behind Superior Carbonation
- Oak Barrels for Home Brewing
- Pilsner Beer Glasses: Craftsmanship Meets Craft Beer for the Ultimate Sip
- Pressurized Beer Growlers: Innovation or Overkill in Beer Transportation?
- Pressurized Mini Beer Keg System: Pint-sized Power in Beer Freshness
- RTIC vs YETI: Cold Truth Behind This Cooler Titan Rivalry
- Sanke vs. Corny Kegs: Understanding the Key Differences for Homebrewers and Commercial Use
- The Best Ice Packs for Coolers: Full Buying Guide
- The Complete Guide to Beer Glassware: Understanding Types, Styles, and Shapes in Simple Terms
- The Inkbird Wifi Temperature Controller: A Comprehensive Review
- The Square Keg: Perfect Pressure, Perfect Pour – New Age Growler for Beers & Cocktails!
- The Thumper Keg Explained [Step-by-Step]
- The Ultimate Guide to Fermentation Temperature Controllers
- Top 5 Beer Towers: Serving Your Brews in Style and Efficiency
- Top 5 Floating Coolers for Your Next Trip to the Water
- Top Durable Silicone Can Covers for Freshness & Discretion
- Top-Rated Conical Fermenters: A Comprehensive Guide to the Best
- Torpedo Kegs: Mini, Portable, and Awesome
- TrailKeg Pressurized Beer Growler: Freshness and Durability Unpacked
- TRULY Portable Kegerators: Revolutionizing Outdoor Beverage Experience [Top 5 Picks]
- Ukeg Go Pressurized Growler Review: Beer Freshness on the Move
- USA-Made Coolers: 8 Best Local Brands
- Wine Coolers 101: Top Picks for Wine Lovers
- Yeti Cooler Colors: An All-Inclusive Guide
As long as you choose the right brewing equipment according to your specific needs, nothing can stop you from brewing the best beer. Happy brewing!
Lead marketer, brewer, dad, and husband. Pretty much an all-round awesome guy. Self proclaimed coffee addict who’s been home brewing beer (among other things) for 25+ yrs. Also an aspiring pro-brewer and micro-brewery owner!